Welcome to Active Agenda! Once you download and install Active Agenda, you can begin scheduling and share scheduling and client information with others at your organization.
Note: This guide does not cover the initial organization setup of Active Agenda, only logging in to an already created organization and day to day usage. If you’re setting Active Agenda for the first time at your organization please see Getting Started.
Logging into Active Agenda
Once installed, an Active Agenda icon should be on your desktop, start Active Agenda by double clicking it. If an updated version is available, it will automatically be downloaded and installed, and then you will be presented with the login screen.
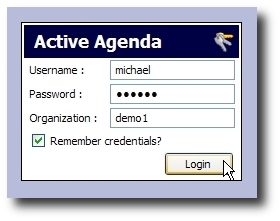
Enter the login credentials provided by your network administrator. If you will be frequently logging in from the same computer, you can check ‘Remember my credentials’ to save yourself from entering your Username and Organization each time. Click ‘Login’ to login to Active Agenda.
Navigating time
Whether you want to schedule a new appointment or see what appointments are already scheduled, the first step is to navigate to the applicable date(s). You can do this by either clicking on the applicable date in the Navigation Box or using the toolbar. See the image below for reference.
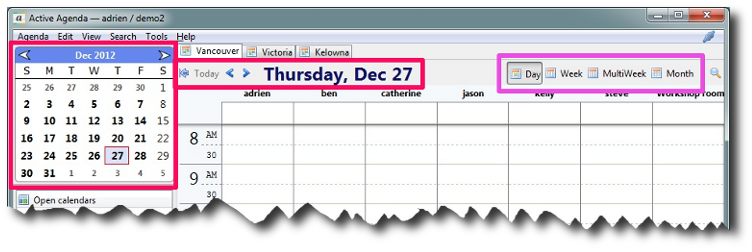
You can view time using five different views in Active Agenda.
| View | Description |
| Day | A single day with all viewable calendars are displayed side-by-side as columns |
| Week | The week shown with each day as a column |
| MultiWeek | Display multiple weeks (2-6) as rows |
| Month | The entire month is displayed with a row for each week |
Use the toolbar to switch between the different views.
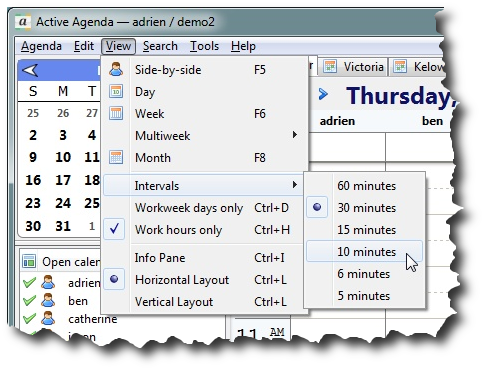
Layout
In the View menu you can configure Active Agenda to toggle between a horizontal and vertical interface layout and toggle if the Info Pane should be displayed or not.