
Often there are communications (phone calls, in person conversations etc) between your organization and a client prior to an appointment, most commonly to remind the client and/or confirm the appointment. Client Communications (will be shortened to simply “Communications” for the remainder of this document) provides an easy, systematic way of entering and tracking this information.
The Communications system allows your organization to track communications with clients including:
- When it occurred
- With which staff member
- The Status (confirmed, canceled, etc)
- Any other additional info staff may choose to add
Note: An Communications doesn’t need to be associated with an appointment. You can use the system to track any communication between your organization and a client by navigating to the client record and clicking the “Communications” tab.
The system can be used with any client appointment by opening the Communications dialog box by the appointment context menu (right click) or by opening the appointment and clicking “Communications…”.
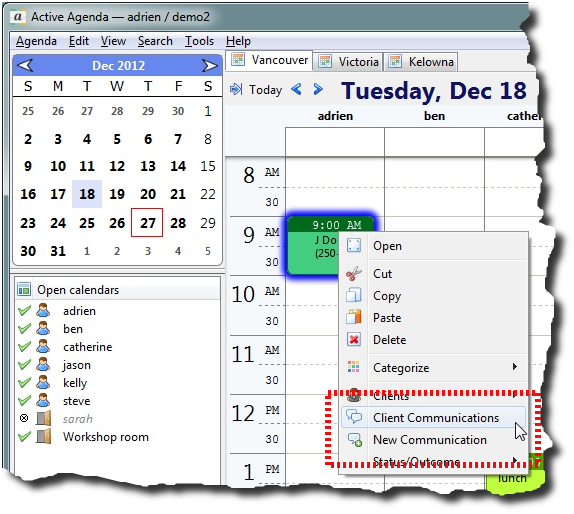
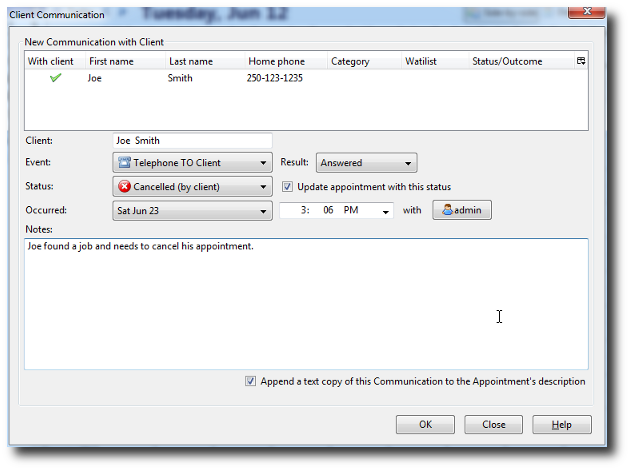
To add an Communication you simply click “New Communication…” and provide the following:
- Select the Client the Communication occurred with (the first/only client will be selected automatically)
- Select the Communication type from the drop down menu:
- Telephone TO Client
- Telephone FROM Client
- In Person
- Email TO Client
- Email FROM Client
- Optionally set the Result. Which Results are options depends on the communication type you select, for example “Telephone TO Client” has the Result options:
- Answered
- No Answer
- Left Message
- Other
- Optionally select the Status (more on this below). Statuses can be customized but by default there is :
- Confirmed
- Left Message
- Canceled
- Rescheduled
- Optionally set the time the communication occurred and with which staff member. This will default occurring at the current time with you (the logged in account).
- Optionally add any notes about the communication
- Optionally check “Append a text copy of this communication to the Appointment’s description”. This will append a short note detailing this communication into the appointment’s description so other staff don’t need to open this communication to see the details.
- Click “OK”
The newly created communication will appear in the communications dialog box, you can double click the communication entry to open it for viewing or modification.
A Communications tab has been added to the client record that enables you to:
- View all communications between your organization and that client
- Add new communications that are not associated with any appointment